Linux and WSL2 - Part 2
How do you run Windows applications on Linux? Or vice versa.
Hi folks, good to see you again.
Today I continue with the sequel to my previous blog.
Now that we have managed to run Linux applications on windows, we can continue to convert a Windows application to a Linux version.
For this we will use the Uno Platform again.
By using a number of Skia libraries it is possible to render UWP views to pixel perfect multi-platform 2D views.
In a previous blog we have already converted a Windows application to Android. Here we solved most of the issues we encountered to generate a working application. So hopefully we don’t run into too many issues here.
Uno’s documentation already shows you how to do this with a simple empty application, but we are going to do this with our own sample application. Especially since a number of aspects for LOB applications such as navigation and mvvm are already used here. Also, we are not going to use the Uno template but a standard .Net Core application.
You are free to download the last version 2021.0003.3 of the I-Synergy.Framework to apply the steps below.
Prerequisites
Install dotnet core 3.1 and 5.0 in Linux
Head over to your Linux console and execute the following commands to install dotnet core in your Linux distro.
echo "Installing .NET Core"
wget https://packages.microsoft.com/config/ubuntu/20.04/packages-microsoft-prod.deb -O packages-microsoft-prod.deb
sudo dpkg -i packages-microsoft-prod.deb

sudo apt-get update; \
  sudo apt-get install -y apt-transport-https && \
  sudo apt-get update && \
  sudo apt-get install -y dotnet-sdk-3.1 && \
  sudo apt-get install -y dotnet-sdk-5.0
Additional requirements for debugging Linux applications in Visual Studio
Install these requirements on your Windows environment:
- Install the VS WSL Extension
Install the GTK3 runtime
This runtime is recommended by Uno Platform, but i didn’t need it. Maybe because i’m using x410???
Creating a new project
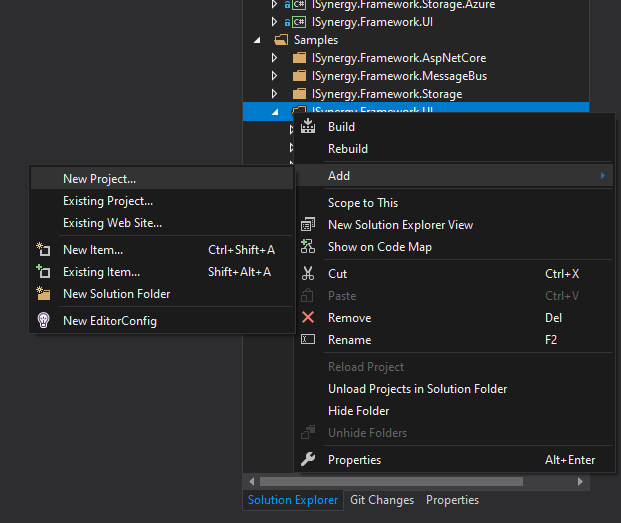
In the Samples directory we open the solution folder ISynergy.Framework.UI.
You will already find the UWP, Android and WebAssembly projects that already work.\
Here we add a new project by clicking it with the right mouse button and Add > New Project
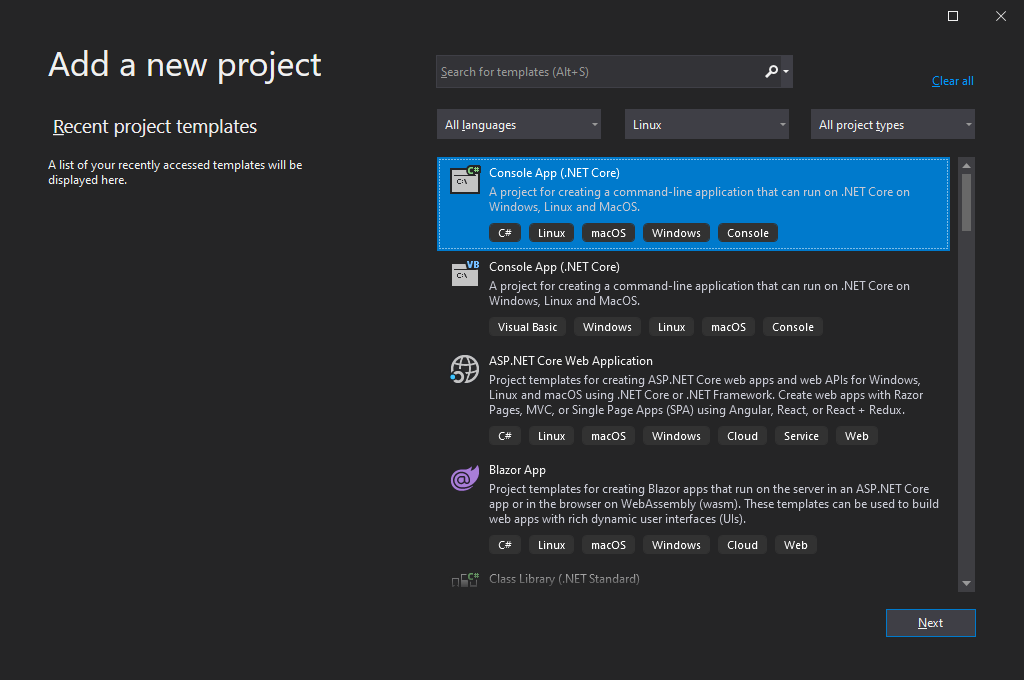
Select Linux under platforms and then Console App (.Net Core) and click Next.
Select the right folder where you want to save the project and name the project.
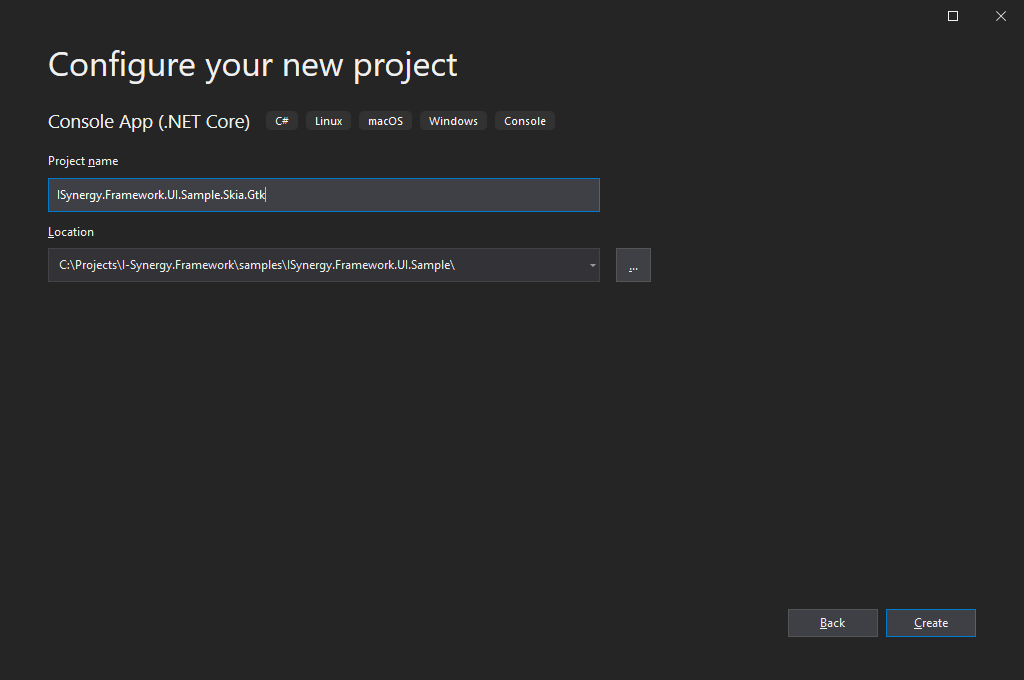
In our case ISynergy.Framework.UI.Sample.Skia.Gtk
Why Skia.Gtk and not Linux? Because this project is also used by the WPF head.
WPF head??? Yes, we can also convert our application to WPF. For this we need this project that uses the Skia libraries. If you don’t use WPF, you can call it Linux.
It’s your party.Click Create.
You now have a new project (.Net Core) that can already run on Linux. However, we can’t do anything with this yet because it doesn’t support views. For this we are going to adjust a number of things.
Adjusting the projects .csproj file
For this we have to double click on the project name which will open the file.
Now it contains the following:
<Project Sdk="Microsoft.NET.Sdk">
  <PropertyGroup>
    <OutputType>Exe</OutputType>
    <TargetFramework>netcoreapp3.1</TargetFramework>
  </PropertyGroup>
</Project>
Change this to this:
<Project Sdk="Microsoft.NET.Sdk">
    <PropertyGroup>
        <OutputType Condition="'$(Configuration)'=='Release'">WinExe</OutputType>
        <OutputType Condition="'$(Configuration)'=='Debug'">Exe</OutputType>
        <TargetFramework>netcoreapp3.1</TargetFramework>
        <AssemblyName>ISynergy.Framework.UI.Sample</AssemblyName>
    </PropertyGroup>
    <ItemGroup Condition="exists('..\ISynergy.Framework.UI.Sample.Shared')">
        <Content Include="..\ISynergy.Framework.UI.Sample.Shared\Assets\StoreLogo.scale-100.png" Link="Assets\StoreLogo.png" />
        <Content Include="..\ISynergy.Framework.UI.Sample.Shared\Assets\Fonts\uno-fluentui-assets.ttf" Link="Assets\Fonts\uno-fluentui-assets.ttf" />
    </ItemGroup>
    <ItemGroup>
        <UpToDateCheckInput Include="..\ISynergy.Framework.UI.Sample.Shared\**\*.xaml" />
    </ItemGroup>
    <ItemGroup>
        <!-- Note that for WebAssembly version 1.1.1 of the console logger required -->
        <PackageReference Include="Microsoft.Extensions.Logging.Console" Version="1.1.1" />
        <PackageReference Include="Microsoft.Extensions.Logging.Filter" Version="1.1.1" />
        <PackageReference Include="Uno.UI.Skia.Gtk" Version="3.4.0" />
        <PackageReference Include="Uno.UI.RemoteControl" Version="3.4.0" Condition="'$(Configuration)'=='Debug'" />
    </ItemGroup>
    <ItemGroup>
      <ProjectReference Include="..\..\..\src\ISynergy.Framework.Core\ISynergy.Framework.Core.csproj" />
      <ProjectReference Include="..\..\..\src\ISynergy.Framework.Mvvm\ISynergy.Framework.Mvvm.csproj" />
      <ProjectReference Include="..\..\..\src\ISynergy.Framework.UI\ISynergy.Framework.UI.csproj" />
      <ProjectReference Include="..\ISynergy.Framework.UI.Sample.Core\ISynergy.Framework.UI.Sample.Core.csproj" />
    </ItemGroup>
    <Import Project="..\ISynergy.Framework.UI.Sample.Shared\ISynergy.Framework.UI.Sample.Shared.projitems" Label="Shared" />
</Project>
A quick look at the changes shows that the most important change is the Nuget references and the conditional OutputType in the first PropertyGroup.
The first ItemGroup checks whether the shared project exists and if so, it retrieves the assets. This is the logo and font.
The 2nd ItemGroup retrieves all xaml files in your shared project and checks them to see if they are up to date in the input for the build.
The ItemGroup after that contains all the referenced projects we need here. Our Core, Mvvm and UI libraries are defined here.
The imported project is our shared library which we also use in other heads. It contains all the common code and views.
Adjusting the Program.cs file
This file is the entrypoint of our application. We change this from:
using System;

namespace ISynergy.Framework.UI.Sample.Skia.Gtk
{
    class Program
    {
        static void Main(string[] args)
        {
            Console.WriteLine("Hello World!");
        }
    }
}
to:
using System;
using GLib;
using Uno.UI.Runtime.Skia;

namespace ISynergy.Framework.UI.Sample.Skia.Gtk
{
    class Program
    {
        static void Main(string[] args)
        {
            ExceptionManager.UnhandledException += delegate (UnhandledExceptionArgs expArgs)
            {
                Console.WriteLine("GLIB UNHANDLED EXCEPTION" + expArgs.ExceptionObject.ToString());
                expArgs.ExitApplication = true;
            };

            var host = new GtkHost(() => new App(), args);

            host.Run();
        }
    }
}
The only thing we need to pay attention to is line 17 var host = new GtkHost(() => new App(), args);
New App references to our startup class situated in our shared project, App.xaml.cs.
That’s it!
That’s all what is needed to create the Linux head.
Pretty neet don’t you think?
Well, let’s try to debug it in Linux.
Debugging on Linux
First, set this new project as Startup project.
You do this by right clicking on this project and select Set as Startup Project
On the toolbar, click on the debug button’s arrow pointing down and select WSL2
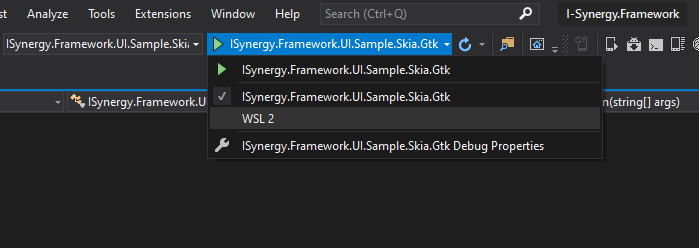
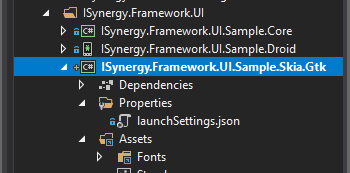
You will notice that a new file launchSettings.json has been added under properties.
We need to edit this file and change the value of the environmentVariables to point it to the right X-Server.
We mentioned the installation and configuration of it in the previous post
Also we need to retrieve the IP Address of our WSL instance. This is because Windows changes the WSL vEthernet IP after every boot.
It’s probably possible to set this to a static ip, but that’s out of scope of this subject.
The easiest way for now is to run the following command in the Linux terminal
echo $DISPLAY
In our case using x410 our settings will look like this with the just retrieved IP Address.
{
  "profiles": {
    "ISynergy.Framework.UI.Sample.Skia.Gtk": {
      "commandName": "Project"
    },
    "WSL 2": {
      "commandName": "WSL2",
      "environmentVariables": {
          "DISPLAY": "172.26.208.1:0.0"
      },
      "distributionName": ""
    }
  }
}
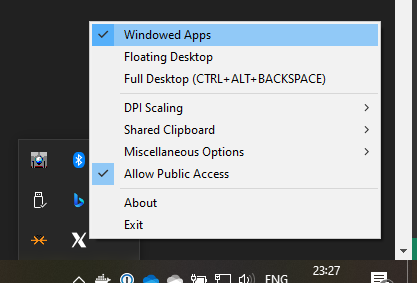
Hold on your horses, don’t start yet!
Let’s start x410 and don’t forget to set it on Windowed Apps.
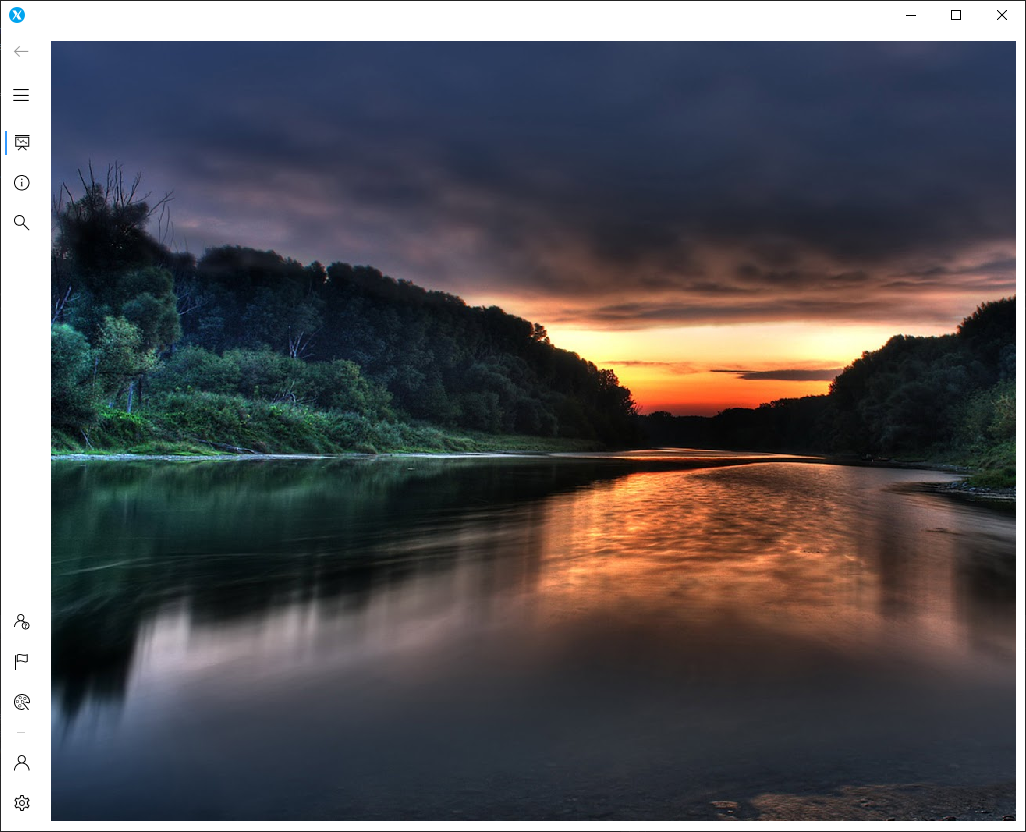
Voila!
There you have it. Our UWP application is running on Linux.
However, there are some issues to overcome
- MessageDialog is not supported yet, you have to use a ContentDialog derived control
- NavigationView looks distorted when it’s not collapsed
- Buttons are missing a border.
I will later dive into these issues, but for now we completed te circle from running Linux apps on Windows and vice versa.
Thank you again Uno Platform.